Procuring commercial LED Screens involves significant capital expenditure. It also demands a long-term infrastructure commitment from your organization. Many leaders struggle when choosing hardware for their specific spaces. The primary friction in decision-making is translating abstract technical specifications into tangible business value. Industry terms like nits, pixel pitch, and refresh rates often confuse buyers. This confusion creates a gap between engineering jargon and operational reality. We aim to bridge this gap effectively today. You need an evidence-based framework to evaluate display technology properly. This guide will help you understand the hardware without over-speccing or under-delivering on your project goals. You will learn how to match visual specifications to environmental realities. We will also explore the critical differences in packaging technologies. Finally, you will discover how to plan for physical integration and operational success.
Matching pixel pitch to actual viewing distance is the single largest driver of cost-efficiency.
Selecting between SMD and COB packaging dictates both durability and visual performance.
High refresh rates and specific brightness levels are only necessary for targeted use cases (e.g., broadcast, direct sunlight).
Total Cost of Ownership (TCO) relies heavily on hidden factors: thermal management, structural weight, and front-vs-rear serviceability.
Buyers must categorize primary hardware solutions to understand their commercial applications. The market currently relies on three distinct packaging technologies. Each approach offers specific advantages regarding durability, visual performance, and manufacturing complexity. Selecting the wrong package type often leads to premature hardware failure or disappointing visual results.
Surface-Mounted Device technology represents the undisputed industry standard. Engineers encapsulate three individual diodes (Red, Green, Blue) into a single pixel. They mount this pixel directly onto the printed circuit board (PCB). This method provides exceptional versatility. You will find SMD panels in corporate lobbies, retail stores, and most high-resolution outdoor displays.
SMD delivers excellent color blending because the diodes sit incredibly close together. It also provides wider viewing angles than legacy alternatives. However, the protruding pixels remain vulnerable to physical impact. You should avoid placing standard SMD panels in high-touch environments without protective overlays.
Chip-on-Board is a premium solution rapidly gaining market share. Manufacturers bypass traditional pixel encapsulation. They bond the naked diodes directly to the PCB. Next, they seal the entire surface under a robust resin coating. This process creates a smooth, hardened surface.
COB technology thrives in high-traffic environments. It offers superior contrast ratios because the dark resin absorbs ambient light. The sealing process also makes these panels highly resistant to water, dust, and physical impact. They are the preferred choice for micro-LED applications. However, this technology carries a higher upfront price tag. Calibrating colors across different COB modules is also notoriously complex.
Dual In-line Package represents legacy display technology. If you look at older highway billboards, you are looking at DIP. This technology uses separate, bullet-shaped RGB bulbs protruding distinctly from the circuit board.
DIP cannot compete with modern technologies in resolution. The physical size of the bulbs prevents tight pixel spacing. Despite this limitation, DIP remains highly durable. It delivers exceptional brightness levels. Buyers still use DIP for low-resolution, extreme-weather outdoor signage where audiences view the content from great distances.
Common Packaging Comparison
Technology | Primary Application | Durability | Visual Resolution |
|---|---|---|---|
SMD | Indoor & High-Res Outdoor | Moderate | High |
COB | High-Traffic & Micro-LED | Excellent | Ultra-High |
DIP | Distant Outdoor Billboards | High | Low |
Many buyers mistakenly over-purchase resolution. They base their commercial display decisions on consumer television habits. A living room TV requires extreme pixel density. A digital billboard viewed from fifty feet away does not. Understanding pixel pitch prevents you from wasting budget on invisible pixels.
The Golden Rule of Viewing Distance
Industry experts rely on a simple 1:1 metric. One millimeter of pixel pitch equals one meter of optimal viewing distance. Pixel pitch refers to the distance between the center of one pixel and the center of the adjacent pixel. If you purchase a P2.5 screen (2.5mm pitch), the optimal viewing distance begins at 2.5 meters. Standing closer reveals the individual pixels. Standing further away blends the image perfectly.
The Cost vs. Density Curve
Pixel density drives hardware costs exponentially, not linearly. Halving the pixel pitch quadruples the total diode count on the board. For example, moving from a P4 to a P2 screen means you are paying for four times as many LED components. You also pay for the upgraded processing power required to drive them. Only push for tighter pitches when your audience proximity demands it.
Contextual Sizing Guidelines
Follow these steps to determine your ideal pixel pitch:
Measure the minimum viewer distance: Identify exactly where your closest audience member will stand.
Evaluate your content type: Text-heavy dashboards require tighter pitches for legibility. Ambient, slow-moving video can tolerate wider pitches.
Calculate the optimal pitch: Apply the 1:1 rule. Round up slightly if you are displaying abstract artistic visuals. Round down if you display critical data points.
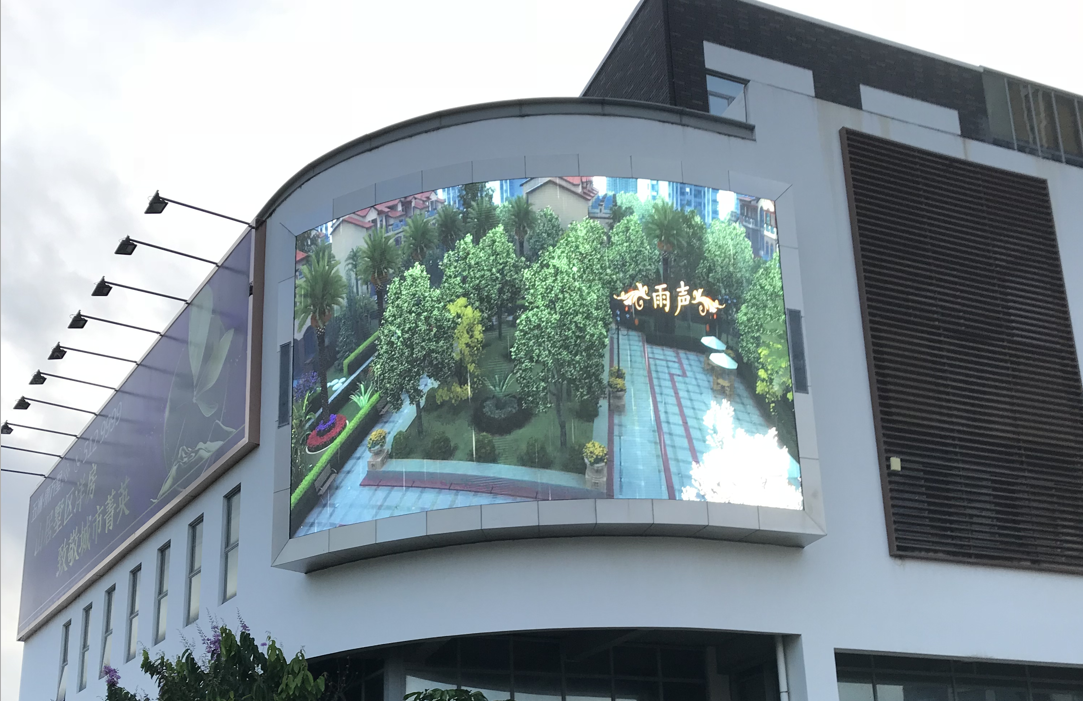
Aligning your visual specifications with environmental realities guarantees project success. Buyers frequently misunderstand brightness and refresh rates. They assume higher numbers automatically yield better results. In reality, mismatched specifications create terrible viewing experiences and operational headaches.
Engineers measure display brightness in nits. Choosing the correct nit level depends entirely on ambient light conditions.
Indoor Environments: Standard indoor displays require between 600 and 1,500 nits. Retailers often ask for the brightest panel possible. Running LED Screens at 100% brightness indoors causes severe eye strain for viewers. It also wastes massive amounts of electricity. Furthermore, maxing out brightness degrades the diode lifespan rapidly.
Outdoor Environments: Outdoor displays require between 5,000 and 10,000+ nits. These panels must combat direct sunlight. If you install an under-powered panel outdoors, the content washes out completely during midday hours.
Refresh rate dictates how many times per second the hardware draws a new image. Human eyes and camera lenses perceive refresh rates very differently.
Standard refresh rates sit around 1920Hz. This specification works perfectly for direct human viewing. If you install a panel in a corporate lobby or a retail storefront, 1920Hz delivers a flawless, smooth image to the naked eye.
High refresh rates span from 3840Hz to 7680Hz. You only need these elevated rates for specific on-camera applications. Virtual production studios, broadcast television sets, and major event spaces demand high refresh rates. When a camera shutter speed clashes with a low refresh rate display, it produces scan lines and the distracting moiré effect. Upgrading to 3840Hz eliminates these digital artifacts entirely, ensuring your display looks pristine on film.
Focusing purely on visual specifications ignores critical physical realities. Failing to plan for structural weight, heat dissipation, and power draw leads to disastrous installations. You must treat large-scale displays as architectural integrations, not just large televisions.
Your building must safely support the physical weight of the installation. Manufacturers house panels in two primary cabinet materials. Die-cast aluminum cabinets offer a lightweight, highly precise solution. They allow for fast installation and perfect alignment, though they cost more. Conversely, standard iron cabinets provide a budget-friendly alternative. However, iron cabinets weigh significantly more. They often require expensive structural reinforcement to the host wall before installation can begin.
Millions of active diodes generate intense heat. Effective thermal management prevents hardware failure. Insufficient airflow traps heat behind the panels. This trapped heat accelerates color shifting and degrades the electrical components. In many cases, ignoring airflow requirements instantly voids the manufacturer warranty.
Assess your site carefully. Indoor deployments often require supplemental HVAC systems to cool the installation space. Do not install massive digital walls in tight, unventilated alcoves without engineering an exhaust solution first.
Electrical planning requires careful distinction between maximum and average power consumption. Maximum Power Consumption indicates the absolute peak electrical draw. This happens when the panel displays a pure white image at maximum brightness. You use this metric to plan your circuit breakers and electrical infrastructure.
Average Power Consumption typically hovers around 30% to 40% of the maximum draw. Normal video content contains dark areas and varied colors, reducing the electrical load. You use the average metric to estimate your ongoing operational energy bills.
Hardware maintenance requires physical space. You must determine how technicians will access the internal components when repairs become necessary. Front-maintenance designs allow technicians to use magnetic suction tools to pull modules directly off the front face. This architecture requires zero rear footprint. It serves as the ideal solution for flush, wall-mounted lobby displays.
Rear-maintenance designs require a dedicated physical space behind the hardware. Technicians access the wiring and power supplies through back doors. You see this architecture commonly in massive outdoor builds or stadium installations. It demands a built-in catwalk or a hollow structural frame.
Your visual output is only as good as your processing hardware. Reputable sender and receiver ecosystems determine color accuracy and signal stability. Industry-standard processors from companies like NovaStar or Brompton guarantee smooth performance. If you accept cheaper, unbranded alternatives, you risk visible content tearing. You also lose advanced color calibration capabilities, making it impossible to achieve perfect brand color matching.
Diodes degrade slowly over time. Even the best manufacturers experience slight color variances between different production runs. You must purchase an extra 3% to 5% of spare diodes from the exact same manufacturing batch as your primary display. If a module fails three years from now, you will need those exact spares. Replacing a failed module with a part from a different production batch creates a permanent, highly visible "patchwork" color inconsistency on your wall.
Finding the right commercial display technology requires balancing environmental constraints, audience proximity, and structural capacity. You cannot rely on resolution and brightness numbers alone. The physical space dictates the required specifications just as much as the content itself. By understanding packaging types, pixel pitch rules, and infrastructure realities, you protect your capital investment.
We advise decision-makers to audit their installation site thoroughly. Measure ambient light levels, verify structural load capacities, and map out exact viewing distances. Do this before requesting vendor proposals. Finally, always recommend arranging an on-site demonstration. Seeing the technology perform under your specific lighting conditions remains the most reliable way to validate your final choice.
A: The industry standard half-life is 100,000 hours of continuous use. This means the display will reach 50% of its original brightness after roughly ten years. However, running panels at maximum brightness, failing to manage ambient heat, or exposing indoor-rated components to high humidity will accelerate diode degradation significantly.
A: The Moiré effect is a distracting visual interference pattern that appears when photographing digital displays. It happens when the camera's sensor grid conflicts with the display's pixel grid and refresh cycle. Upgrading to a high refresh rate (3840Hz or above) synchronizes the image draw cycle with camera shutter speeds, eliminating the visual distortion entirely.
A: Yes. Outdoor installations demand strict Ingress Protection (IP) ratings to survive the elements. You should mandate a minimum rating of IP65 for the front face to block high-pressure water jets and dust. The rear components should maintain at least an IP54 rating to protect against windblown debris and heavy rain.